Friday, October 26, 2012

Dealing with Hazardous Chemicals during Home Modification


Today, I have a guest poster, Brian Turner. Brian is an environmental and safety advocate for the Mesothelioma Cancer Alliance. His concern for workplace safety, even during a DIY project, inspired this blog post, which helps raise awareness of the hazards that sometimes lurk inside old homes. 

_________________

Whenever men and women undertake a renovation project in their own homes, they will need to be carefully aware of possible hazardous materials. Older homes may yet contain asbestos, which was used for many years to aid in insulation measures. Asbestos, in fact, contains serpentine-like molecules that can become ingested into the human body, where they can lead to mesothelioma and other serious issues. If individuals will be working specifically with tearing out insulation, they will need to follow some guidelines that will allow the modification to proceed without any ill effects.

One of the first things that renovators should do is assess where the asbestos itself is located. If it is beginning to deteriorate and is also located near vents or air ducts, then it will have to be ripped out and disposed of. It should be treated as a carcinogen and should never be handled except with professional techniques that make use of hazardous material suits, masks, and gloves. Asbestos that is located near vents can release airborne particles, which can eventually be breathed in by anyone who lives in or frequents the house on a regular basis.

There are a number of places that asbestos may show itself when old fixtures and materials are being replaced. In addition to the insulation that is found near ducts, men and women should also look out for textured paint and certain kinds of tile, which can also contain the material. In fact, old paint may in fact be lead-based, which is another hazardous chemical that should be watched for. Scraping paint off of old walls should be done carefully and with the right gear. If individuals insist on performing the work themselves, they may want to glean some trusty information from renovators who are more experienced with paint removal.

Because special care must be taken to remove asbestos, there are a few things that should be done straightaway. A well-ventilated area is absolutely necessary. Closed-in locales will lead to the continuous buildup of tiny particles, which will make the air thick with carcinogens. This is also why masks and gloves must be used. If there is any doubt, renovators should err on the side of caution. With regards to specific tools, people will want to use manual devices whenever possible. This will allow them to slowly chisel away the degrading material while leaving other porous regions free of chemical infection. Power tools should be avoided; mainly because they are too strong for delicate work

The cleanup process must also follow specific stipulations. A thorough vacuuming job must be done after the rip-out work has occurred. This will allow for any remaining materials to be removed from the area. If individuals feel somewhat sick or lightheaded, they should of be seen by a medical professional right away. With the right precautions and an attention to detail, most do-it-yourself projects can be brought to a successful conclusion. Renovators can then move on to another part of the house.

________________


Brian Turner has been working with the Mesothelioma Cancer Alliance as an environmental health and toxic substance safety advocate since June of 2007. Brian brings a tremendous amount of research and awareness experience in environmental health risks, environmental carcinogens, and green building expertise. Brian is very interested in all types of cars; his favorites are classic, muscle, and imports. Brian is commonly found playing and watching various sports with his friends.


Monday, October 22, 2012

Once Upon a Window Seat, Part III

Other installments of this project are found at these links: Part I , Part II and Part IV.

__________________________________________________________________________

This is the third installation of my window seat and book case project. In Part I, I showed how Mr. Vagabond and I plotted the layout and started building the framework. Part II shows real progress with the bones of the window seat and book case really taking shape. In this installation, Part III, we’ll take a look at some finishing work issues that arose and how we worked around them. 
Throughout this project, I learned one very annoying thing: It’s not easy to find a straight board. At the finishing carpentry stage, I also discovered that it’s not necessarily a good idea to buy small boards in strapped bundles. 

We needed 1 x 2 pine boards to use as cleats, which would support the shelves. We bought a bundle of “premium” boards that looked pretty straight. The label gave me some confidence about the purchase:


See? Premium lumber. It has to be good, right? We were disappointed when we cut the straps on the bundle at home. 

Aside from the fact that there was not a single straight board in the bundle, we also discovered this:


This made me wonder what other grades they carry besides “premium” and what those grades look like. The challenges that this premium lumber presented were wrestling with each of the boards to mount them relatively straight, and sanding off the rough, gnawed-looking texture. Thankfully, 1 x 2s are thin and light, so we were able to force them into position as we screwed them into place. To do that, we marked off the level line where the board would mount, pre-drilled the holes and then fastened a board with one screw. After one screw was inserted we pushed or pulled to align the board, and then fought with the rest until it was secure and somewhat straight. Never underestimate the importance of checking the lumber that you buy to ensure that it’s straight. If there are several boards strapped into a bundle, cut the bundle and check each one.

Sanding off the coarse surface proved to be an impossible feat. The more I sanded, the worse it looked. It went from jagged to fuzzy, and never improved from that point. I turned the most awful side toward the wall, and let the least awful side face out. Because I needed nice-looking boards for the front edge of each of the shelves, we made another trip and bought cedar 1 x 2s. They had beautiful, clean, straight edges.


Most of the materials that we used were pine. Additionally, we used poplar plywood and some cedar trim. Staining the three to look reasonably uniform was challenging, but it worked out. 

There’s a trick to nailing a board and then hiding those nails, and that trick is called “countersinking.” Finish carpenters know this trick well, and it is one way to make your project look more professional. This is a close-up image of one of the cedar boards after I had driven in a finishing nail. Notice that the small nail head stands proud of the face of the board. Also note the small depression in the center of the nail head. 

The plywood peeking out under the cedar board would eventually be covered with fancy trim molding. 


I drove in each nail, leaving the head proud of the boards by about 1/16 inch. This saved the boards from being dented by the hammer. Countersinking the nails requires a small tool called a nail set, or you can also use a larger nail or a screw, like I am using here. Anything with a small tip and a head that you can whack with a hammer will sink the nails. 


Tap the nail set or nail or screw with a hammer, driving in the nail until it looks like the next photo. This leaves a small depression that you can fill with stainable wood putty, or caulk if you plan to paint the board. 


After the book cases were finished, we started on the cabinet doors. The left and right cabinets needed doors, and we worked around the nailed-down bench seat by building doors for the front side of the window seat. In this photo, the doors are only set into place and held there with shims. This just gave us an idea of how it would look once the doors were hung.


The doors were another very simple design. I cut 1 x 4s with 45-degree mitered corners, forming a frame that fit each opening. Then I covered the back side with plywood. It’s wise to measure each opening separately and build each door to fit those measurements. Measuring one opening and building the doors the same will invariably result in one door that doesn’t fit. After cutting the frame boards, I set them on a very sturdy and very flat surface, pre-drilled through the corners of the frame and nailed the assemblies together. You can use wood glue for a tighter fit at the joints, if you like, but it wasn’t necessary with ours. This is basic joinery; a butt joint. Butt joints are where two pieces of wood are butted together and fastened. If you have mad woodworking skills, you’ll probably want a fancier, sturdier joint. 

Covering the back side of the door frames was fairly easy. I cut the plywood approximately 1 inch smaller on each side, making a piece that fit the opening, and with a generous amount of excess past the edges of the frame opening on the back side. After laying the plywood on the back side of the frame and nailing it down, I secured each edge of the plywood to the frame with very plain, narrow, lipped molding. The small lip slips over the edge of the plywood and fits flush for a clean, tidy look on the back side of the doors. 

At this stage of the game, we were really starting to see major improvement. The whole room took on a more finished look, which is saying a lot. The living room has been one of the biggest challenges in the renovation. It’s a little over 12 feet wide, but almost 30 feet long. The window seat and book cases helped balance the room tremendously, making it feel less like a shotgun and more like a living space. 

My next and last installment will be staining the book case, and a special treatment that I am still applying to the back wall inside each of the book shelves.  


XOXO

Photobucket

Saturday, October 20, 2012

Once Upon a Window Seat, Part II

Other installments of this project are found at these links: Part I , Part III and Part IV.

__________________________________________________________________


After the first day of construction on the window seat and book cases, we realized that we were in for a lot more work than we’d planned for. That’s ok, because my vision was spurring me on. Mr. Vagabond was spurred on by copious amounts of tequila. 


We had planned to build a hinged lid for the window seat, which would allow us to use the space underneath for storage. Unfortunately, we couldn’t find a single 1 x 12 at Lowe’s that wasn’t twisted or bowed or otherwise skewed. This was a problem. We stabilized the underside of the 1 x 12 boards by framing them out with 2 x 4s, but that didn’t help. One end of the bench top remained determined to stand proud of the base by at least 1 1/2 inches. We had to nail the boards to the frame, and we didn’t get a hinged lid. But we worked around that later. 

That's Pepsi in the water bottle. I do weird things like that. 


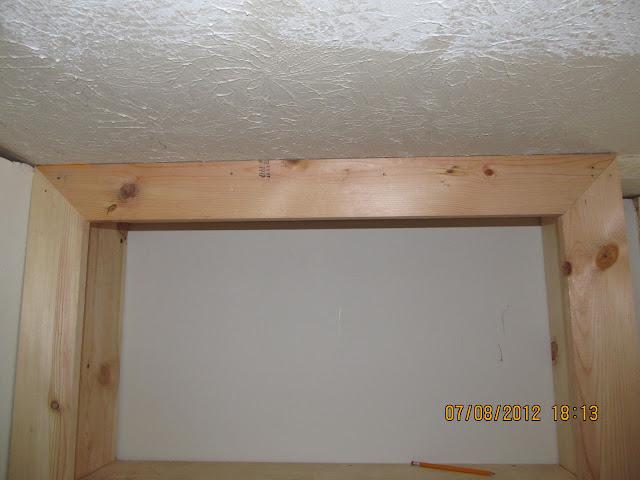
After we nailed down the boards for the seat, we started building the book cases on top of the two cabinets. This was a very simple design. Each book case consisted of two 1 x 12s for the sides of the cabinets, two 2 x 2s mounted to the ceiling across the top (mounted furniture-grade plywood on the 2 x 2s later), and then a series of 2 x 2s nailed to the back wall and interior sides of the book cases. The 2 x 2s were cleats, which we used to support the shelves. The book case on the left has shelves that are about 20 inches apart. The book case on the right has shelves that are closer together. 


The bottom and top of each book case was fashioned from supports and furniture-grade plywood. The plywood had a much nicer grain than the 1 x 12s, so I wanted as much of the plywood to show as possible. 


I fastened the plywood to the supporting boards with finishing nails. As you can see, I marked off where I wanted the bottom shelf to stop, and I cut my supporting boards and plywood to fit. After everything was installed, I countersunk all of the finishing nails because I planned to stain the whole built-in instead of painting it. 


This is how I take measurements around here -- on anything that is handy! A scrap of 2 x 4...


Or on the back side of an old boarding pass! 


I wish I were heading to Utah again right now. *sigh*


And this is the circular saw that I use when I absolutely, positively need my cut to be straight as an arrow. I use the old Black & Decker that my dad gave to me. I have several other circular saws, but this one is Old Reliable. 


And this is what happens when I use my dad’s saw. A perfect cut for a perfect fit  :-)


Finally we started to make the kind of progress that lets you stand back and smile for a minute. The shelves were in, the bottom of the book case was mounted and the trim around the front was turning out beautifully.


Just look at those beautiful mitered cuts. Those were courtesy of our basic Delta miter saw. 


We did have a slight issue with the plywood on the sides of the book cases. I’m not naming names, but someone installed it with the grain running left-to-right instead of up and down. I found this scene when I woke on one of the numerous mornings of the project. It wasn’t easy to pry off, lemme tell ya. And I was running out of plywood, so I had to cut the replacements perfectly. 


At the end of the first week, this is what we’d accomplished. 


We had some weird configurations here and there, due mostly to being sick and tired of running to Lowe’s, but it was turning out just great. We figure that the next time tornado season rolls though east Tennessee, we’re camping out inside one of these cabinets. The house might fall, but this thing isn’t going anywhere. 

Next week, my idea of “premium lumber” is really challenged. 

P.S.  I really need to start keeping my work spaces tidier! 


XOXO

Photobucket

Friday, October 5, 2012

Once Upon a Window Seat, Part I

Follow the rest of this project at the following links: Part II , Part III and Part IV.
_____________________________________________________________________

Since I've posted a couple of photos after the fact, it’s time to go back and start from the beginning. When Mr. Vagabond and I bought this old house, I almost immediately started planning a window seat flanked by two cabinets at the front end of the living room. The space was ideal, with two 3-foot-wide, 7-foot-tall windows centered on the wall, and an equal amount of wall space on both sides of the windows. We lived here for about 5 years before we launched the project. I am nothing, if not a patient person.

At the moment, the built-in looks like this. I still have work to do, but the rest is for me to finish as I can. Hopefully before Christmas.


The first photo (below) in the series to follow shows how the project began... a full year ago. It didn't take a year to finish, just to move past the part where I committed to it and where actual construction began. When I installed the new floor in the living room, I bought flooring materials on sale and was afraid I would run short. To avoid that, I framed out the foundation for the window seat and both cabinets, and then installed the flooring up to the edge. As you can see, I had some new lumber, but I also repurposed a lot of leftover boards from other projects. It's not as if lumber has an expiration date.

The boards on the floor along the wall were much too short in pieces, but the foundation didn’t have to be pretty; it only had to function. The board fastened to the wall under the window would serve as a cleat to anchor the back side of the window seat. I fastened all of the lumber to the floor and wall with 4-inch deck screws, which seems like overkill since I didn't anticipate rain in the living room (a dangerous thing to say in a house that's over 120 years old). I used deck screws instead of common wood screws because we had a large boxful on hand, they're strong, and the heads are less likely to strip when driving them in. Four-inch screws also let me grab the studs in the wall that were buried under what I discovered were layers and layers of plaster, drywall, old furring strips and paneling, and more drywall. Probably the walls in this house are a lot different from yours.


View from the left end.


Now, this lovely assembly looked exactly like these two images for about a year before any further progress was made. I installed the living room floor, but took no steps, short or otherwise, toward completing the project. Then we learned that Mr. Vagabond’s family planned to visit us in August. Yikes! Along with everything else that had to be done, I really wanted this thing finished when they arrived. Mr. V. asked what my top priorities were, and I saddled him with this, among several other things. Good thing he’s a good sport. 


View from the right end.


In the next image, Mr. V. is doing a test fit for the front and back “walls” of the window seat. They were built, raised, leveled and fastened the same as you would frame up a wall in your house, just smaller. Each section consisted of one horizontal board across the top and bottom, and short vertical boards across the width which serve as miniature studs. You might notice that the framework at the right end of the book case is awfully short. That’s because I changed my mind (I do that), and wanted book cases instead of ceiling-to-floor cabinets. Because the foundation was much too deep for book cases, we decided on two short cabinets at each end of the window seat with a book case on top of each cabinet. 

I’m skipping past the part where he measured the foundation that I built, shook his head and told me that he loved me. Several times. He said that with a heavy sigh, and sometimes a chuckle. He also laughed at my use of salvaged lumber, but did have to agree that there was no sense to be found in buying new 2 x 4s to use where they would never be seen. 


This is day-1. Errr, night-1

While I was out of the room, he decided that he didn’t like my wall cleat, and planned a new height and configuration for the window seat. It didn’t occur to me until later (too late) that he wasn’t using my carefully-planned seat height measurements, and was instead working with his own height in mind. My feet dangle off the edge of the window seat now. I’m considering building a step.

Standard chair seat height is approximately 18 - 20 inches, by the way. Most chairs are about 18 inches deep, too, but I like to sit sideways. The finished depth became about 2 feet, which lets me do that comfortably. 

In the next photo, we had built both walls and set them upright on the foundation. We found the straightest board that we owned (which is hard to do when shopping at Lowe’s, lemme tell ya), laid the board as a bridge across the top of both walls, front to back, and set the level on top of the board. Ordinarily, you’d use a 4-foot level, but ours was in the garage, which is at the back 40 of the property, and it was dark. And there is no electricity in the garage. Because we have never found a single floor in the whole house that is level, we had to shim up the framework. Only then were we able to fasten the whole thing together. 


Never underestimate the importance of building things level, square and plumb. 


The next photo was taken at the end of the first day. We had spent most of the day at Lowe’s, so we got a late start. Day-2 held a lot more progress.


Little Sinner in the way helping.


Gypsy made her own progress, taking advantage of the fact that Mama and Dada were otherwise occupied. I caught her turning a board into toothpicks on the sofa. People think that I exaggerate when I tell them about the things that she does. By the time we’d worked all of one day, she’d torn several small holes in the sofa. Oh well. I wanted to bring my awesome old vintage sofa downstairs anyway.


Not the most normal dog on Earth.


At the end of the first day, we wondered what we'd gotten ourselves into. That's pretty much a theme around here. We also realized that our $600 budget was about to be tested. Although we purchased much more materials than we thought we'd need, things almost never go as planned. We made at least five more trips to Lowe's, and at least as many to the liquor store. 

Next week, Part II


XOXO

Photobucket