_____________________________________________________________________
Since I've posted a couple of photos after the fact, it’s time to go back and start from the beginning. When Mr. Vagabond and I bought this old house, I almost immediately started planning a window seat flanked by two cabinets at the front end of the living room. The space was ideal, with two 3-foot-wide, 7-foot-tall windows centered on the wall, and an equal amount of wall space on both sides of the windows. We lived here for about 5 years before we launched the project. I am nothing, if not a patient person.
At the moment, the built-in looks like this. I still have work to do, but the rest is for me to finish as I can. Hopefully before Christmas.
The first photo (below) in the series to follow shows how the project began... a full year ago. It didn't take a year to finish, just to move past the part where I committed to it and where actual construction began. When I installed the new floor in the living room, I bought flooring materials on sale and was afraid I would run short. To avoid that, I framed out the foundation for the window seat and both cabinets, and then installed the flooring up to the edge. As you can see, I had some new lumber, but I also repurposed a lot of leftover boards from other projects. It's not as if lumber has an expiration date.
The boards on the floor along the wall were much too short in pieces, but the foundation didn’t have to be pretty; it only had to function. The board fastened to the wall under the window would serve as a cleat to anchor the back side of the window seat. I fastened all of the lumber to the floor and wall with 4-inch deck screws, which seems like overkill since I didn't anticipate rain in the living room (a dangerous thing to say in a house that's over 120 years old). I used deck screws instead of common wood screws because we had a large boxful on hand, they're strong, and the heads are less likely to strip when driving them in. Four-inch screws also let me grab the studs in the wall that were buried under what I discovered were layers and layers of plaster, drywall, old furring strips and paneling, and more drywall. Probably the walls in this house are a lot different from yours.
 |
| View from the left end. |
 |
| View from the right end. |
In the next image, Mr. V. is doing a test fit for the front and back “walls” of the window seat. They were built, raised, leveled and fastened the same as you would frame up a wall in your house, just smaller. Each section consisted of one horizontal board across the top and bottom, and short vertical boards across the width which serve as miniature studs. You might notice that the framework at the right end of the book case is awfully short. That’s because I changed my mind (I do that), and wanted book cases instead of ceiling-to-floor cabinets. Because the foundation was much too deep for book cases, we decided on two short cabinets at each end of the window seat with a book case on top of each cabinet.
I’m skipping past the part where he measured the foundation that I built, shook his head and told me that he loved me. Several times. He said that with a heavy sigh, and sometimes a chuckle. He also laughed at my use of salvaged lumber, but did have to agree that there was no sense to be found in buying new 2 x 4s to use where they would never be seen.
 |
| This is day-1. Errr, night-1 |
While I was out of the room, he decided that he didn’t like my wall cleat, and planned a new height and configuration for the window seat. It didn’t occur to me until later (too late) that he wasn’t using my carefully-planned seat height measurements, and was instead working with his own height in mind. My feet dangle off the edge of the window seat now. I’m considering building a step.
Standard chair seat height is approximately 18 - 20 inches, by the way. Most chairs are about 18 inches deep, too, but I like to sit sideways. The finished depth became about 2 feet, which lets me do that comfortably.
 |
Never underestimate the importance of building things level, square and plumb.
 |
| Little Sinner in the way helping. |
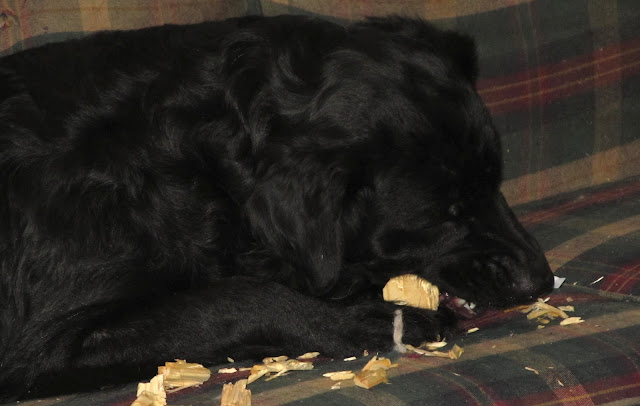
Gypsy made her own progress, taking advantage of the fact that Mama and Dada were otherwise occupied. I caught her turning a board into toothpicks on the sofa. People think that I exaggerate when I tell them about the things that she does. By the time we’d worked all of one day, she’d torn several small holes in the sofa. Oh well. I wanted to bring my awesome old vintage sofa downstairs anyway.
 |
| Not the most normal dog on Earth. |
At the end of the first day, we wondered what we'd gotten ourselves into. That's pretty much a theme around here. We also realized that our $600 budget was about to be tested. Although we purchased much more materials than we thought we'd need, things almost never go as planned. We made at least five more trips to Lowe's, and at least as many to the liquor store.
Next week, Part II
XOXO
XOXO


Hi,
ReplyDeleteI have a quick question about your blog, do you think you could e-mail me?
Brian
Great blog about property refurbishment. I like to read your blog.
ReplyDeleteDetailed and well renovation blog, and your dogs are cute also, I bet they want to assist in renovating.
ReplyDelete