__________________________________________________________________
After the first day of construction on the window seat and book cases, we realized that we were in for a lot more work than we’d planned for. That’s ok, because my vision was spurring me on. Mr. Vagabond was spurred on by copious amounts of tequila.
We had planned to build a hinged lid for the window seat, which would allow us to use the space underneath for storage. Unfortunately, we couldn’t find a single 1 x 12 at Lowe’s that wasn’t twisted or bowed or otherwise skewed. This was a problem. We stabilized the underside of the 1 x 12 boards by framing them out with 2 x 4s, but that didn’t help. One end of the bench top remained determined to stand proud of the base by at least 1 1/2 inches. We had to nail the boards to the frame, and we didn’t get a hinged lid. But we worked around that later.
 |
| That's Pepsi in the water bottle. I do weird things like that. |
After we nailed down the boards for the seat, we started building the book cases on top of the two cabinets. This was a very simple design. Each book case consisted of two 1 x 12s for the sides of the cabinets, two 2 x 2s mounted to the ceiling across the top (mounted furniture-grade plywood on the 2 x 2s later), and then a series of 2 x 2s nailed to the back wall and interior sides of the book cases. The 2 x 2s were cleats, which we used to support the shelves. The book case on the left has shelves that are about 20 inches apart. The book case on the right has shelves that are closer together.
The bottom and top of each book case was fashioned from supports and furniture-grade plywood. The plywood had a much nicer grain than the 1 x 12s, so I wanted as much of the plywood to show as possible.
I fastened the plywood to the supporting boards with finishing nails. As you can see, I marked off where I wanted the bottom shelf to stop, and I cut my supporting boards and plywood to fit. After everything was installed, I countersunk all of the finishing nails because I planned to stain the whole built-in instead of painting it.
This is how I take measurements around here -- on anything that is handy! A scrap of 2 x 4...
Or on the back side of an old boarding pass!
I wish I were heading to Utah again right now. *sigh*
And this is the circular saw that I use when I absolutely, positively need my cut to be straight as an arrow. I use the old Black & Decker that my dad gave to me. I have several other circular saws, but this one is Old Reliable.
And this is what happens when I use my dad’s saw. A perfect cut for a perfect fit :-)
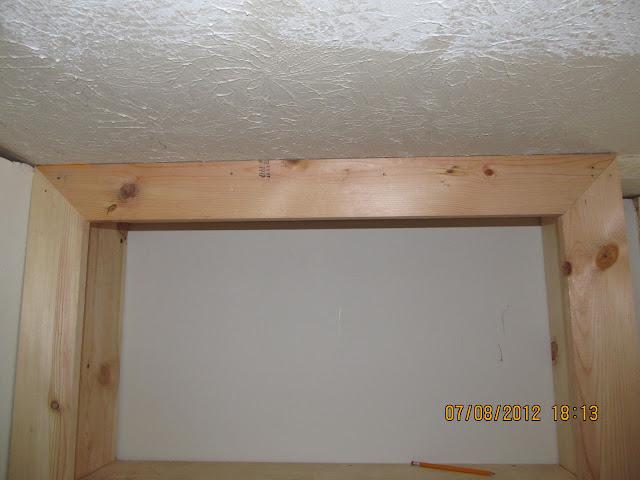
Finally we started to make the kind of progress that lets you stand back and smile for a minute. The shelves were in, the bottom of the book case was mounted and the trim around the front was turning out beautifully.
Just look at those beautiful mitered cuts. Those were courtesy of our basic Delta miter saw.
We did have a slight issue with the plywood on the sides of the book cases. I’m not naming names, but someone installed it with the grain running left-to-right instead of up and down. I found this scene when I woke on one of the numerous mornings of the project. It wasn’t easy to pry off, lemme tell ya. And I was running out of plywood, so I had to cut the replacements perfectly.
At the end of the first week, this is what we’d accomplished.
We had some weird configurations here and there, due mostly to being sick and tired of running to Lowe’s, but it was turning out just great. We figure that the next time tornado season rolls though east Tennessee, we’re camping out inside one of these cabinets. The house might fall, but this thing isn’t going anywhere.
Next week, my idea of “premium lumber” is really challenged.
P.S. I really need to start keeping my work spaces tidier!


No comments:
Post a Comment